Tag Archives: tutoring

Book Reports Can Be Tough…Use a Graphic Organizer to Help Your Child

31 Jan

You and I may take our ability to write a quick synopsis for granted.  Think back to when you first started writing book reports, was it frustrating?  Many of you will answer, “Yes”!  Here’s why: you were an emerging reader when you started this skill.  Ponder this,  reading, sounding out words, rereading for fluency, and then trying to understand the plot of a story ?  Whew!  What a gnarly feat!  Thus, comes major frustration (from you and your child) when it comes to writing a summary or book report.

Here are some tips for avoiding this frustration all together: handwriting_practice

1. The books your kids are reading aren’t too long and typically a teacher gives the entire week to complete the book report.  Have your child read the book multiple times.  Once, to get a handle on the sight words and sounding out words.  Twice, for fluency.  Third, to comprehend the plot.  This can be stretched out over the course of a couple days.

2. Use a graphic organizer, like the one I attached below, to help your kiddo keep notes about the plot.  Initially, children start from the end of the story and work backwards.  Teachers sometimes use the method of “In the beginning…”, “In the middle…”, and “At the end of the story…” to help kids keep plot events in order.  I like the “Somebody, Wanted, But, So, Then” method a little better.  I feel like you can get more plot details from kids with this technique.  Then, the child can use the organizer to help write his/her retell (summary).

3.  At first, take the actual notes in the organizer for your kiddo. Then, have him/her write the retell.  Once he/she is more confident in his/her ability  to use the organizer, graduate him/her  to filling out the organizer by lonesome.

Remember, when your son/daughter comes home with a book report, stay calm and utilize this organizer.  Take it from me, its proven to be successful in the classroom!

How to RETELL a Story


End Homework Stress with the Homework Checklist

23 Jan

If your child’s teacher hasn’t already told you about at home checklists, this post should help you a lot.  Teachers use checklists in their classrooms to modify behavior.  In my own classroom, students were satisfied typically with the stickers I would use on their checklists, but sometimes they could earn extra reading time, a snack break, a walk down the hall (for those kiddos that just can’t stay still), and even lunch with me.  The main idea behind a checklist is to describe the specific behavior outcomes that are expected and to encourage discussion between the child and teacher/parent regarding  how the child did in each denoted category.1027_homework

For example, if the category says, “I will lay out my homework and materials on my desk without being asked.” and the child needs a reminder to do so, this is discussed when the homework is completed.  A teacher/parent would say, “did you lay out your homework and materials on your desk without being asked?”  The child would then get a chance to self-assess how he/she did in this category.  If the objective was met, the child earns a check.  If not, the check is not awarded and he/she does not earn what is being worked for.  Finally, the the teacher/parent would go through each category until the child has self-assessed in each section.  These discussions are a critical piece because it allows the teacher/parent to help the child self-correct and know what specifically needs to be worked on in the future.

Before you get started, review these important keys to implementation:

1. Discuss, explain, and give examples of how the checklist works. Teachers model constantly in the classroom, so try it with your child at home.  The first few times you use this checklist, it will take more effort to explain as you go, but it will get easier.

2. Be consistent!  The rules are listed on the checklist I have attached.  You can add or modify as you see fit.  However, if you implement a rule and a rule is broken, the consequences must take place.  If not, you are teaching the child that rules don’t exist.  Rules exist all the time in the real world…isn’t this what you’re getting your child ready for!

3. Use the checklist all the time or at least very often.  This key goes back to consistency, if you commit the the checklist it will work.  You might need to tweak it based on the interests of your child, but if the expected outcomes are clear, you should be in the clear.

4. Give the child specific praise!  Remember, checklists are used for behavior modification.  Behaviors will change with time.  After every homework session, give the child specific praise of what they did well.  For example, say “You did a wonderful job of showing your work neatly on your math homework.  I can tell you want to produce quality work!”  Additionally, the discussion of each category, should allow the child visually see where improvement is needed.  However, if the undesired behavior continues, you may want to end each session by giving specific feedback about what you would like the child to work on in the next session.

Here is a checklist I created based on earning screen time.  Its a word document that you should be able to edit for your child.  If there is an issue opening it, just let me know.  I’d be happy to email one to you!

hwchecklist

Multi-Sensory Handwriting Step 5- “Big Feeling”

14 Jan
OLYMPUS DIGITAL CAMERA

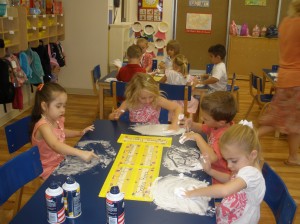
Students writing in shaving cream

Step 5 in this curriculum uses tactile media to enforce letter formation.  I can see this step being very popular with children, especially those who have Autism and like textures.  This step is powerful because is provides tactile and proprioceptive feedback to reinforce motor memory.

Click on the link below to see the update handwriting schedule with the “Big Feeling” steps.

MSH schedule

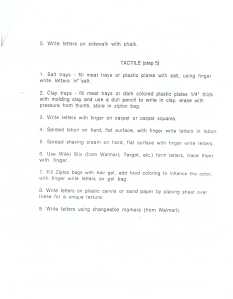
The attachment gives descriptions of each of the tactile activities.  Use the dollar store or what you already have at home as a resource.  Additionally, I understand some may be hesitant to allow their child to spread shaving cream all over a table.  Consider one of two things: 1) shaving cream actually helps to clean the table, not your dining room table, but an old desk or outside play table. 2) if you can get your hands on an old cafeteria tray, use this to help contain the mess of the shaving cream and lotion.  Get involved with the fun activities and model for your child what you want them to do.  Most of use perform better after watching what is being asked of us.  Teachers model constantly in the classroom.

062915

Tomorrow I will tie up the multi-sensory handwriting curriculum with a list of materials and summary.  Enjoy!

Source: Presentation by Janet Seidl, OTR/L

Multi-Sensory Handwriting Step 3- “Big Hands”

11 Jan

Kid-Big-hands_1416247i

This will be a quick post today, because this step is pretty self-explanatory once you take a closer look at the activities.   Not to discount this step, I think its pretty awesome and great for tactile learners or those who are creative.  Also, yesterday I noticed that my schedule was not showing up completely.  As  a result, I have attached it today as a pdf file.  Just click on the link below.

MSH schedulethurs

*To save money, I highly recommend checking out pinterest for recipes for salt or play dough.

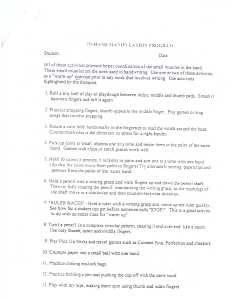
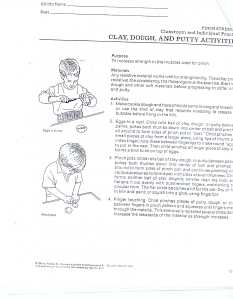
Here is further explanation of the activities for the “Big Hands” of the curriculum.

095042

095126

These are extension activities!

095156

Source: Presentation by Janet Seidl, OTR/L